- Before installation please make sure you are on PPG’s WiFi
Make sure you have downloaded the proper printer Driver.
There are 3 Separate Processes for setting up a printer.
- Installing the Driver
- Setting Up Printer Settings
- Adding your Code
This walkthrough will take you through each step
Install the Printer Driver: PPG Installer
Click here to download the printer Driver PPG Installer
*For Fremont and the Vancouver Downtown offices click here for the Printer Driver
Under Choose Other OS, select MAC OS X

Under PPG Installer, click Download

Go to Download Files and open the Ricoh File

Click on the Ricoh PS Printer Driver Package
Click Continue
Click Continue and run through install process. You may need to enter in computer credentials.
Driver installation complete. Please go to the next section to install the printer onto your computer.
Setting Up Ricoh Printer Settings
Go to System Preferences > Printers & Scanners (This can be found under your launch pad, on your dock in the shape of a gear, or by clicking on the apple menu at the top left of your screen and scrolling down to system preferences)
(This section may look different depending the OS on your machine, however Printers & Scanners is under the system preferences of all Mac OS)

Click on "+" to add a printer

Click on IP

Please enter the following
Address should read: 192.168.100.90
Name should auto populate "Ricoh XX XXXXX"
Use should auto populate an appropriate driver.
Click Add

Adding Your Printer Code
Open up Microsoft Word (If you do not own it, you can download it for free through the app store)
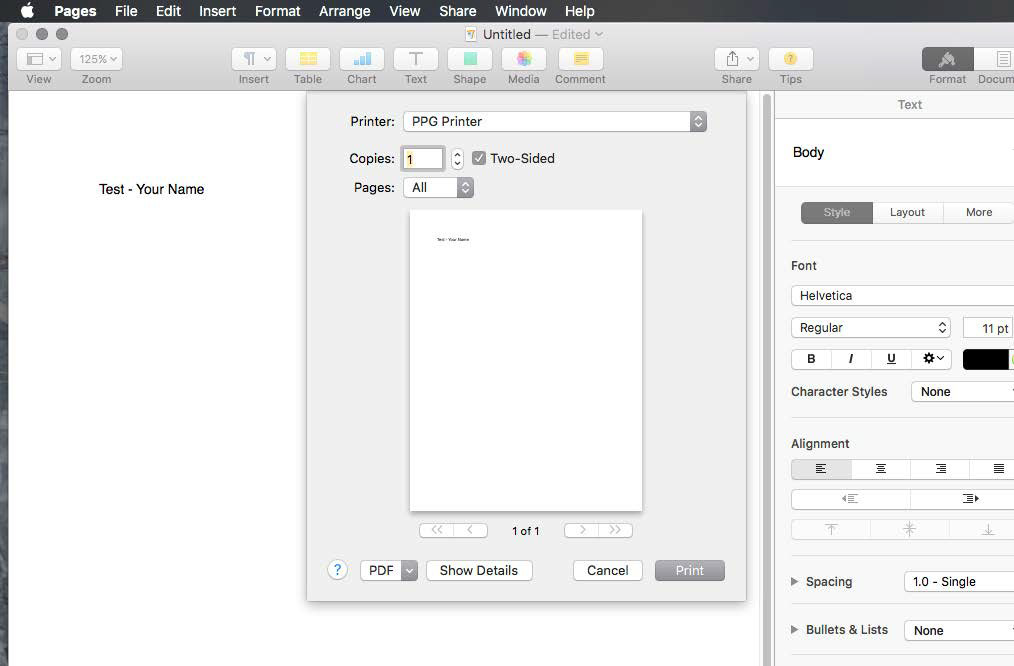
In Microsoft Word create a new document and select File>Print

Select Show Details to bring up additional options.
Select the Page Layout menu and select Job Log

Enter the 4-digit code. Enable User Code and enter your 4-digit code in the User ID and User Code fields.
Do not click print yet!!

Click on Presets Dropdown:

Select Save Current Settings As Preset
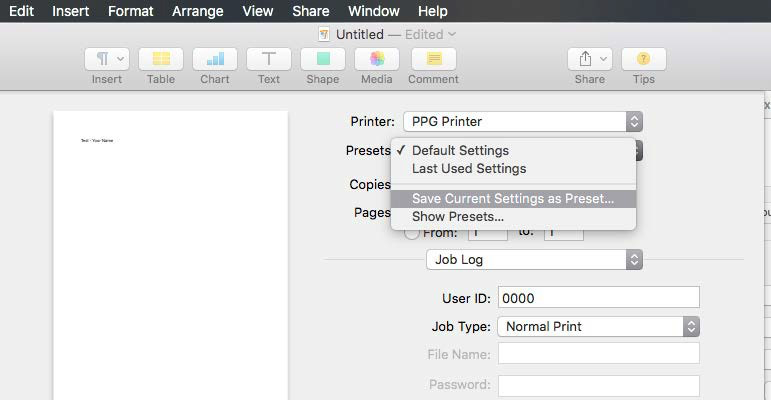
Change Preset Name to PPG Setting – Only for this printer. Click OK

Click print to make sure is working.